In this post we will mainly understand spfx solution folders/files and create no framework type spfx webpart(using typescript, yeoman & gulp)
Basic Setup & Understanding:
Create
O365 SharePoint Site (Developer site)
If we don’t have SharePoint site then we can use Microsoft developer
site.
Search for “SharePoint developer subscription” &
Join. We will get developer SharePoint Sites.
Development
Framework & Tools:
Framework -> We can use any java
script framework like React, Handlebars, Knockout, Angular, and
Vue.js, etc...
Tools -> we can use popular open source tools such as
NPM, TypeScript, Yeoman, webpack, and gulp.
Connect
to SharePoint:
We can
connect SharePoint using
-> Rest api
-> @PnP/JS
-> Microsoft Graph
For
front end we can use
-> Office-Ui-Fabric-React
Know your versions:
Before starting the code we should aware which version we are using.
Node.JS version -> node
-v
SPFx version -> npm ls -g -depth=0
Create New Folder & SPFX Component:
Step1: CMD prompt
Create a new folder(For Ex. folder name as Code) in local drive and open it in comment prompt.
Type the below comment to create spfx component using yoman.
yo @microsoft/sharepoint
It will ask for few details like solution name, webpart name, etc. Enter the below sample details. now we are creating webpart using no framework.
Then it will create the solution in our folder.
Step2: Visual Studio Code
Now we have to open the folder using visual studio code.(or Enter "code ." in cmd prompt it automatically opens this solution in VS Code)
Understanding the SPFx solution structure(refer above image): src:
Under src folder we have "webpart" component & under that we have".ts" file where we will write our code.
webpart.ts File:
This file contains class & render() method where we will write our code. getPropertyPaneConfiguration() method used to update webpart properties.
Class is extends from "BaseClientSideWebPart" base class. & imported from webpart.manifest.json: Contains metadata of webpart(webpart title, description, version, id , etc...)
localization folder is used for setup multi lingual support of webpart properties.
node-modules:
All the dependencies installed in this project will be added here(ex. @microsoft).
Imp note: when we copy this solution to new location we can ignore this "node-modules"
npm install - To install node module & dependencies are added based on pakage.json file details.
package.json:
This file contains dependencies & devDependencies details
dependencies: Contains modules required for runtime
npm install --save (cmd for install as a dependencies)
devdependencies: Contains modules required for development
npm install --save-dev (cmd for install as a dev dependencies)
package-lock.json:
This will lock your dependency version which is currently installed. tsconfig.json:
Used for typescript compilation
gulpfie.jls: Its a javascript task runner, used for compile, build
"config" folder:
config.json:
Contains information of all components present in project
ex. "localizedResources"-we can add multi language files here,
"bundles"-we have manifest & webpart.js files (gulp will generate js file from .ts file)
"externals"-we can add external files like jquery etc.
deploy-azure-storage.json: This file is used while we deploy our cdn to azure
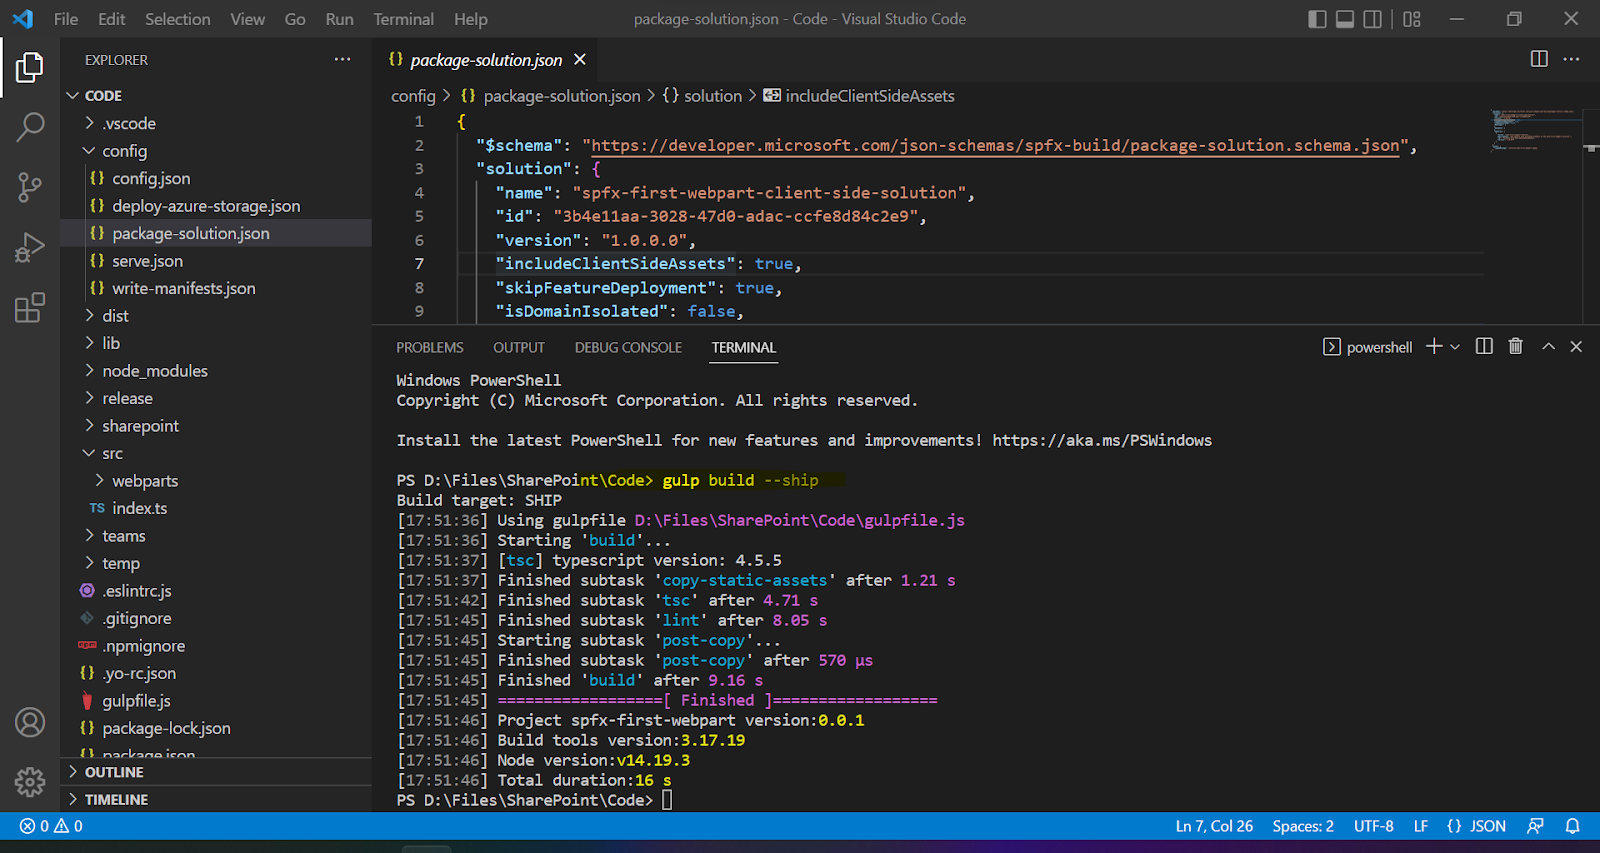
package-solution.json:
Important file which contains name, Id, Version of the solution & package file location
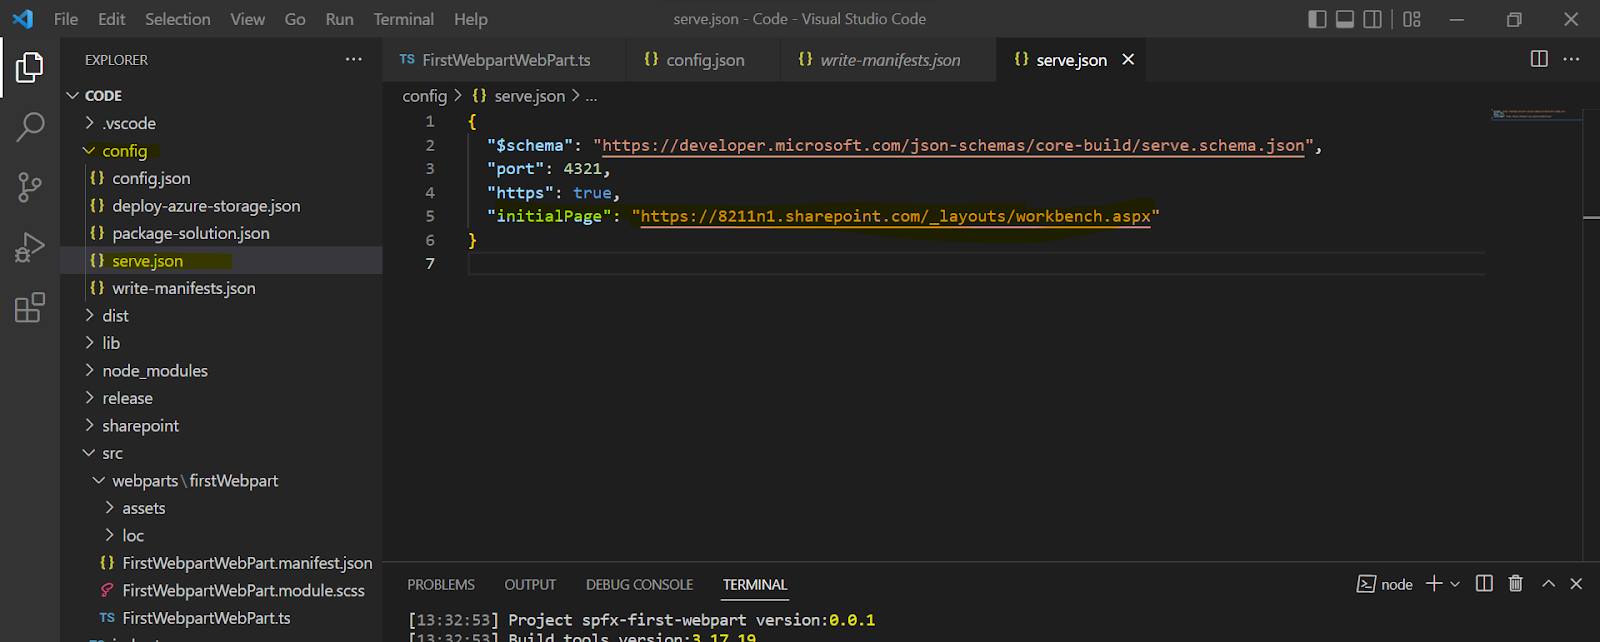
serve.json: contains details of workbench, port number. This file is used for gulp serve
Step3: Test webpart
Local workbench not available in latest SPFx, ie. From Spfx V1.13 So we have to use only SharePoint workbench.
Under config\serve.json enter site url for workbench: "<SP site URL>/_layouts/workbench.aspx"
Now in visual studio code open Terminal (ctlrl + `) and type this commend
gulp serve
if you runing this 1st time then you will get below errors. Type the highlighted comments in the image
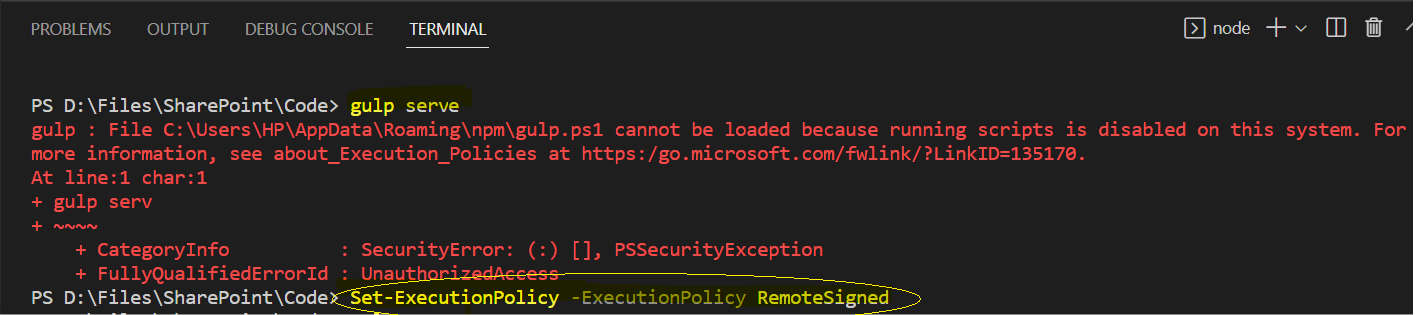
after resolving these errors "gulp serve" command will be executed without any errors & it will lauch the SP Workbench where we can add our webpart and test it.
Step4: Deploy webpart(with ship without ship)
gulp build --ship
gulp bundle --ship
gulp package-solution --ship
"--ship" command will build package for the production. If we only run "gulp package-solution" it will not create production build (Note: This command will not consider "package-solution.json" details & We have to always run gulp server in local host to make this work)
Run the above 3 comments to create sppkg file.
gulp build --ship (This will show any error present in webpart)
gulp bundle --ship( This will bundle the solution. Creates 'dist' folder)
gulp package-solution --ship( Create sppkg file under sharepoint/Solution folder)
Note: '--ship' is a production build code, it will consider "includeClientSideAssets" value (true) from config/package-solution.json file (It will include all the static assets into sppkg file)
After this build we will get out package file "spfx-first-webpart.
sppkg" under sharepoint/Solution > debug folder
Upload sppkg File To AppCatalog:
Once we uploaded this sppkg file to our app catalog site we can add this webpart to pages.
.
Adding webpart to SPPage:Now go to your SPSite>Site Contents>Site Pages > Open/Create SharePoint page > Edit page> add our webpart then publish
Finally our new webpart added and displayed here. Again if you want to do any changes in you webpart then save the changes & run "gulp bundle --ship" & "gulp package-solution --ship" comments
Additional Details(Update Version & create SP Library as CDN):
If we want to upgrade the version then use "config/package-solution.json" file.
To make SharePoint Library as CDN:(add asset files separately instead of adding in sppkg)
By default all the assests will be added in sppkg package file, if we we want to upload assets into separate place(SP Library) Please refer this link Refer this video for more details


Comments
Post a Comment