PowerApps Introduction & Cascading Dropdown using PowerApps
PowerApps Introduction:
Power Apps is a service that lets you build business apps with no coding experience required. Using Power Apps web part it can be added to page by the app’s web address or the app ID.
Power Apps also provides an extensible platform that lets pro developers programmatically interact with data.
Cascading Dropdown using PowerApps
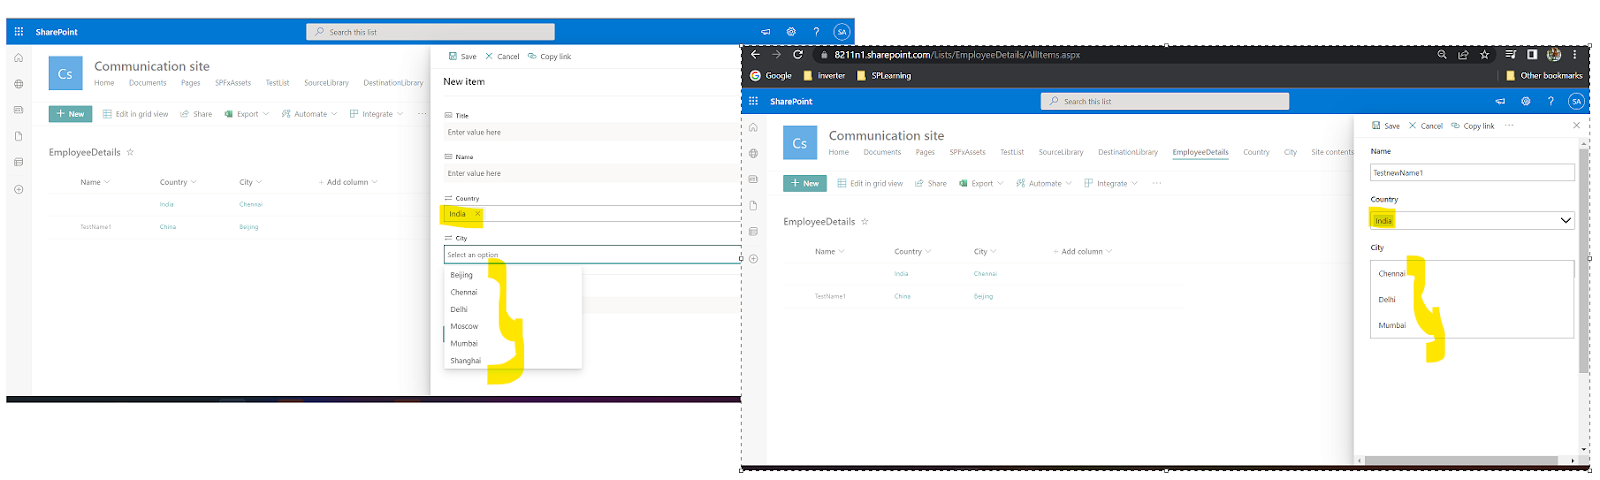
In this example we will see how to create cascading dropdown using PowerApps. We have 2 dropdowns(Country & City). Based on Country dropdown city will be loaded.
SP List setup: we have 3 lists.
Country - Contains Country Names
City - Contains Country & Relevant City Names (Country is lookup from Country List)
EmployeeDetails - Contains EmployeeName, Country & City (Lookup from City List)

Open PowerApps Studio:
Here in Employee details new form -> Any country selected City dropdown will show all city names irrelevant to the country. Using PowerApps we will show City relevant to country selected.
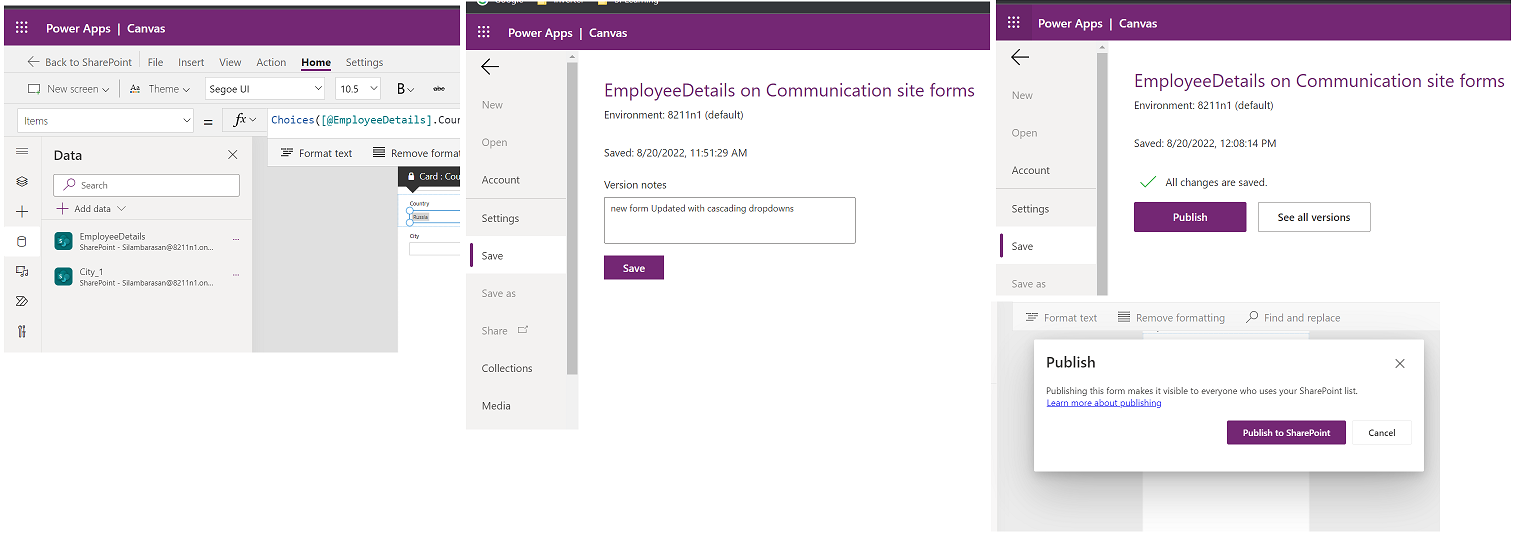
List Settings> Form Settings > Customize in PowerApps > PowerApps Studio will open
Customize New Form:


We will remove fields which is not required from Form. Delete Title & Attachment(Select and press delete button).


Select City dropdown and unlock properties for editing & Update the formula with filter (based on country dropdown value it will filter cities)

Publish to SharePoint & go to our list and create new item.
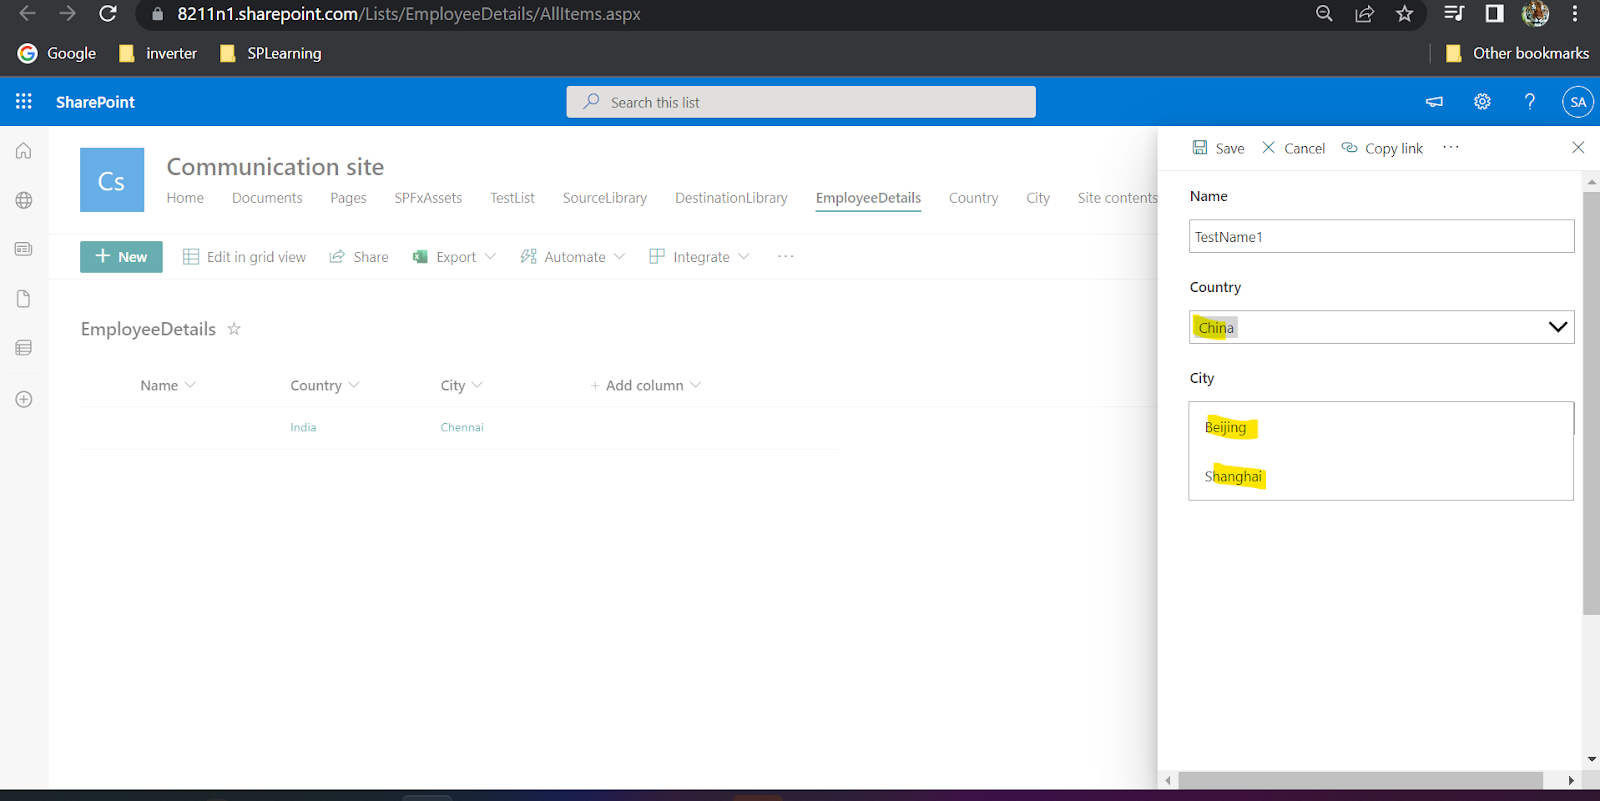
Now it will show cities based on the selected country.
Refer this video for more details


Comments
Post a Comment