Copy Files from one SharePoint library to another using Power Automate
In this post we will see how to copy files, when we upload files to one SharePoint library it will be automatically copied to another SP library using Power Automate.
Scenario 1: Copy File To Same Level (Files will be copied library to another library & not subfolder level)
Scenario 2: Copy File To Different Level dynamically(Files will be copied library sub folder to another library any subfolder)
Scenario 1:
Copy File To Same Level "SP Library -> SP Library"
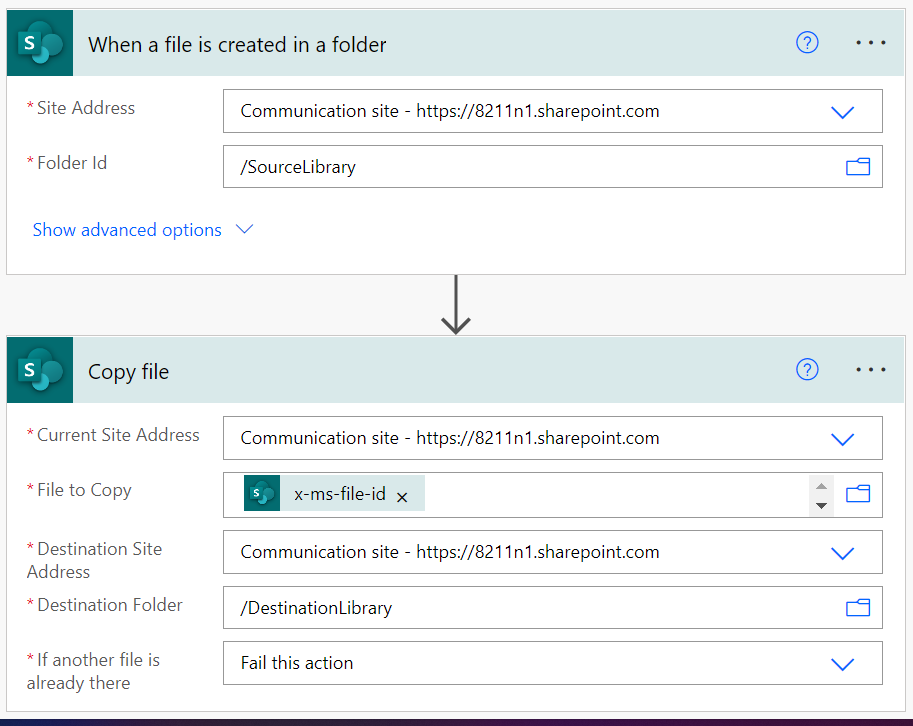
Copy File To Same Level. Files will be copied library to another library without subfolder levels.(Below is image is the complete code for scenario 1)
- Create: From your Power Automate site > Create > Automated Cloud Flow > Enter Flow Name > Select trigger "When a file is created in a folder SharePoint" > Click Create
- Enter SourceFile Details: Select trigger options of which "Site Address" & Library name > Click New Step > Search "SharePoint" > Select Copy File
- Enter Copy File Details: In new step (Copy File) > select source & destination Site Address > select File to copy as "File Identifier" (which is returned by 1st step) > select Destination Library > select what to do if file already exists > click save
- Output: Now if we upload file in Source Library it will automatically copy the file to Designation library
Scenario 2:
Copy File To Different Sub Folders Level dynamically
In this case we will copy the files from SP library sub folder to different library subfolder.
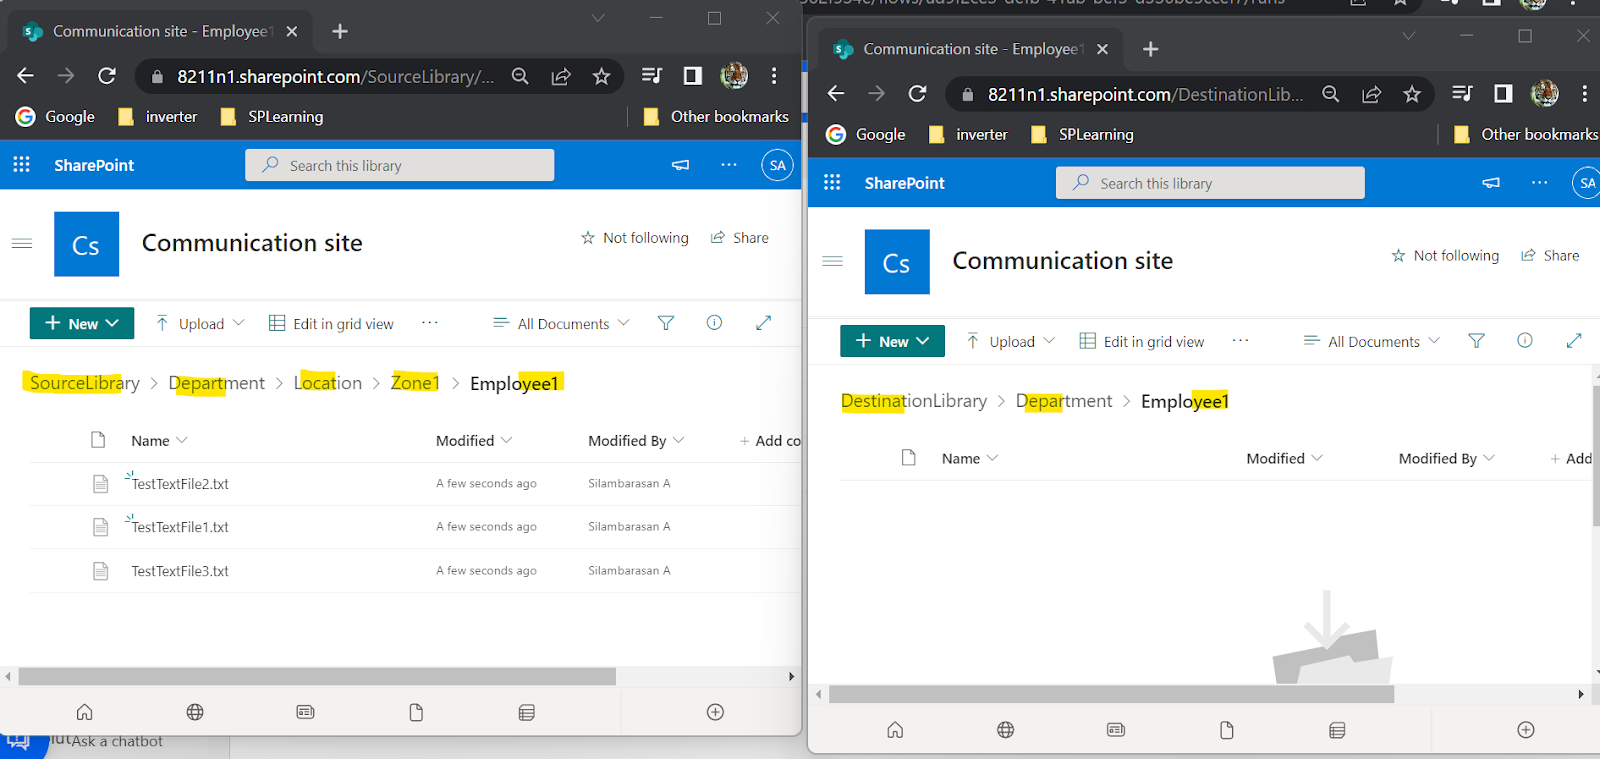
Source Library Subfolder: "DepartmentName(dynamic)/Location/Zone/EmployeeName(dynamic)"
Destination Library Subfolder: "DepartmentName(dynamic)/EmployeeName(dynamic)"
Here "DeptName & EmployeeName" subfolders are dynamic (Like Dept1,2,3... Employee1,2,3...)
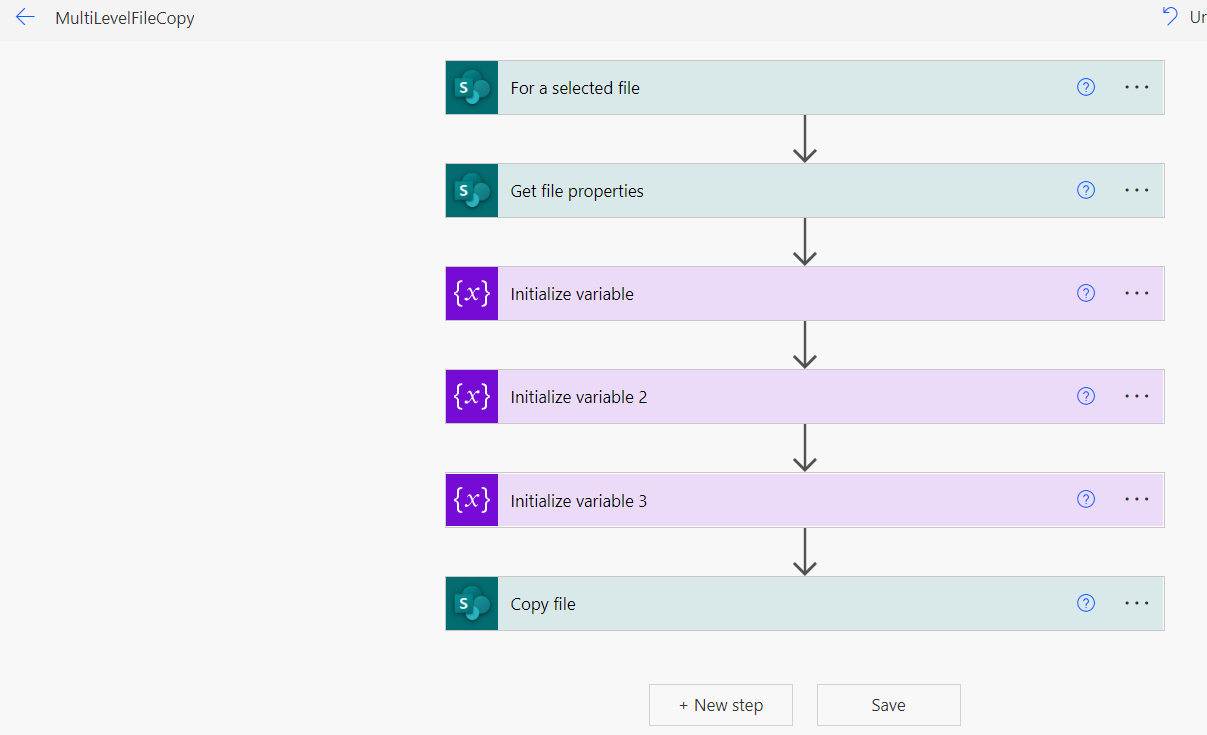
- Create: Create > "Automated Cloud Flow" > Skip the trigger(we can select in next page) > Enter SharePoint > select trigger "For a selected File"
- Enter SourceLibrary & CopyFile Details: Provide details (source Library) > Add new step same as scenario1 "Copy File" select relevant input as mentioned below ("File to Copy" Select "Identifier").
Note here destination folder DepartmentName\EmployeeName are dynamic so we will get it in variable. - GetFileProperties: To get DeptName & EmployeeName we need File path in a variable.
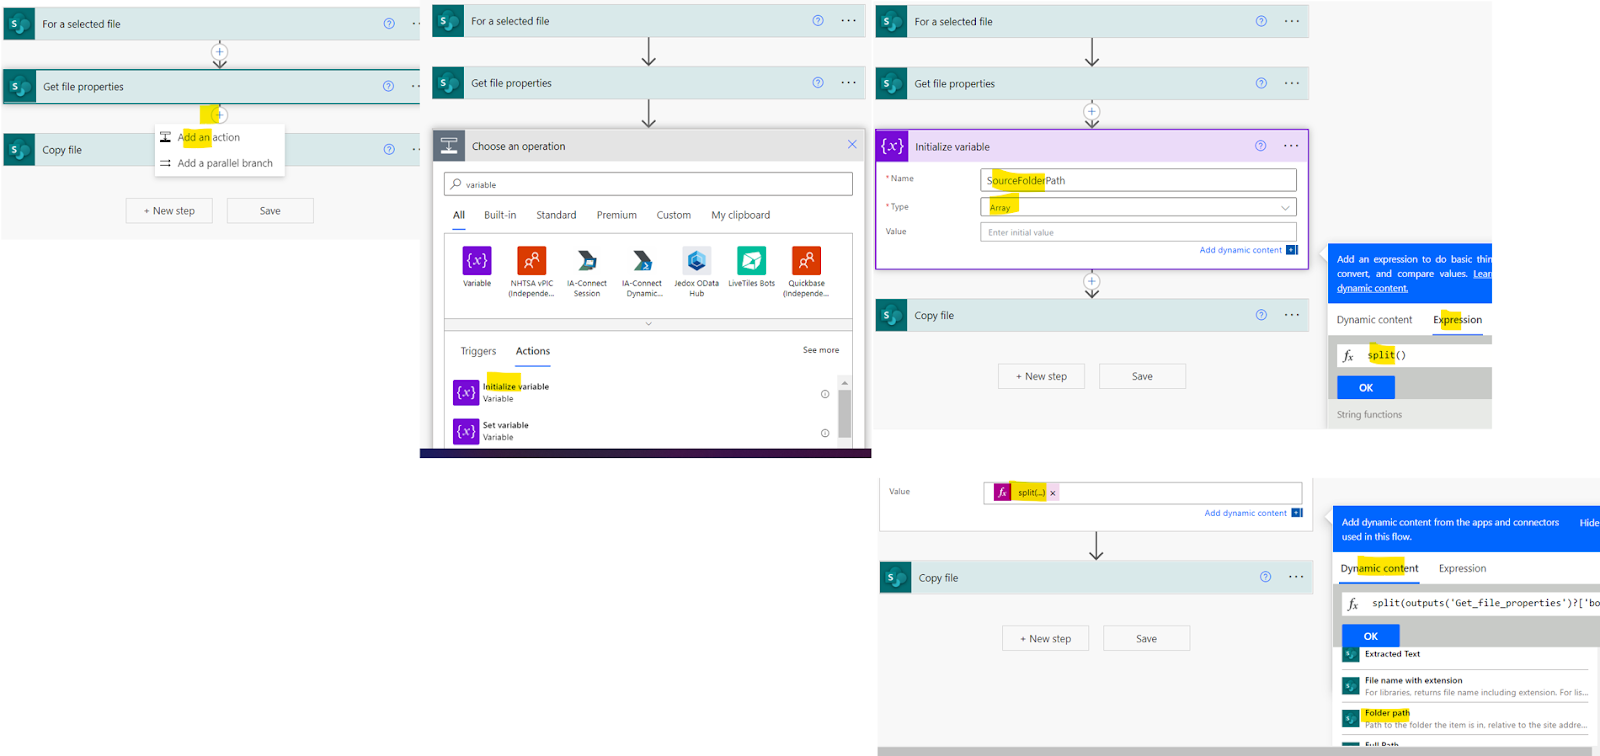
Select "Add an Action" > "Get File Properties" > Enter source Library details.
- Get SourceFolderPath:
Select "Add an Action" > "Initialize Variable" > Enter Variable Name, type & value.
Split the FilePath into array using '\' delimiter split(outputs('Get_file_properties')?['body/{Path}'],'/') - Get Department name: Select "Add an Action" > "Initialize Variable" > Enter Variable Name, type & value
Here in Expression we given 1 since in array Dept is present in that position (Libraryname/Department/Location/Zone/Employee1) - Get Employee Name: Select "Add an Action" > "Initialize Variable" > Enter Variable Name, type & value
Here in Expression we given 4 since in array Employee name is present in that position (Libraryname/Department/Location/Zone/Employee1)
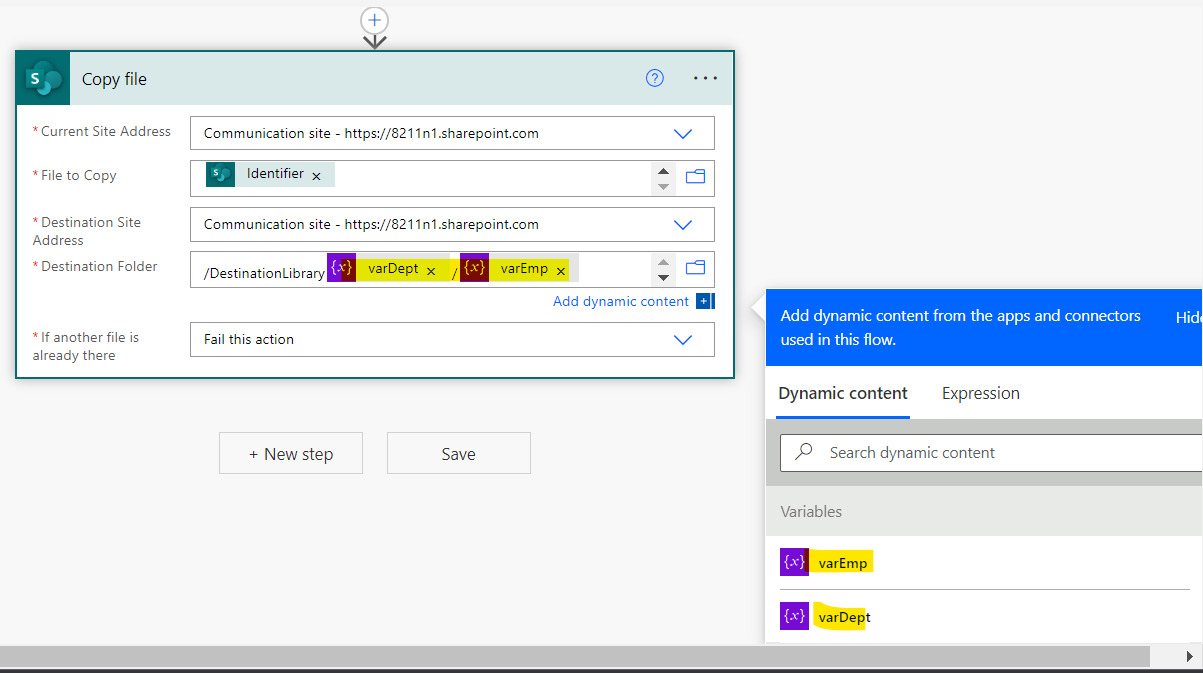
- In the "Copy File" Step > Replace "Department & Employee" variables in destination path (Add '/' between the variables)
Test Our Flow:
When we go to source Library sub folder > select any file > By selection our Automate "MultiLevelFileCopy" > it will automatically copy file to relevant sub folder of destination library
Note: If you select existing file Flow will fail & throw error like "A file or folder with the name '<filename.txt>' already exists at the destination."
Refer this video for more details








Comments
Post a Comment